This Tutorial Was Created For Photoshop 7 and Higher.
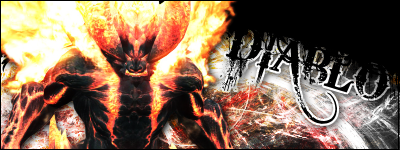
What you are making:
Start a new Photoshop document
Width: 500
Height: 130
Find a render (better if its holding something)
I will be using this render in this tutorial:
Paste ur render as many times as you want on the document and fill up all the empty spaces:
Once u have filled all the empty spaces merge all the layers by pressing Ctrl+E
----->
Then once the layers are merged go
Filter>Distort>Glass and use the following settings:
Now go Filter>Blur>Motion Blur and use the following settings:
Now it should look something like this:
Now create a new layer and call it box. With the Rectangular Marquee Tool (M) make a rectangular space in the middle of the signature like so:
Right click > Stroke with these settings:
The next step is to past your render onto the picture, so create a new layer and paste it on the new layer showing the head only:
Now select the layer called box, and with the Magic Wand Select above and below it by holding shift.
Now select the background layer (the layer with the merged images) and press crtl+u. Tick the box that says Colorize and change the colour of the background to something that suits the renders head.
Heres what mine looks like so far:
Now past the render again onto a new layer. Position it so that what is being held by the render is inside the rectangle on the box layer. Select the box layer and with the magic wand select the inside of the rectangular box:
Right click> Select inverse. and then choose the last layer created and press delete it should now look something like this:
Finally Create a new layer and press CTRL + A , and with the Rectangular Marquee Tool (M) right click > Stroke with these settings:
And now add text to it and it should look something like this:
I hope you liked this simple tutorial.
FattaT


 Reply With Quote
 must have had a lot of practice